Earth Day is April 22, and while it may not be a holiday for parties and presents, it provides an excellent opportunity to teach kids about soil science and sustainability using STEM concepts while giving back to the planet. Using inexpensive materials, kids can assemble a worm bin and feed the worms their food scraps. In just a few weeks, kids will see firsthand how yesterday’s trash can become material to nurture plants.
What Is Compost?
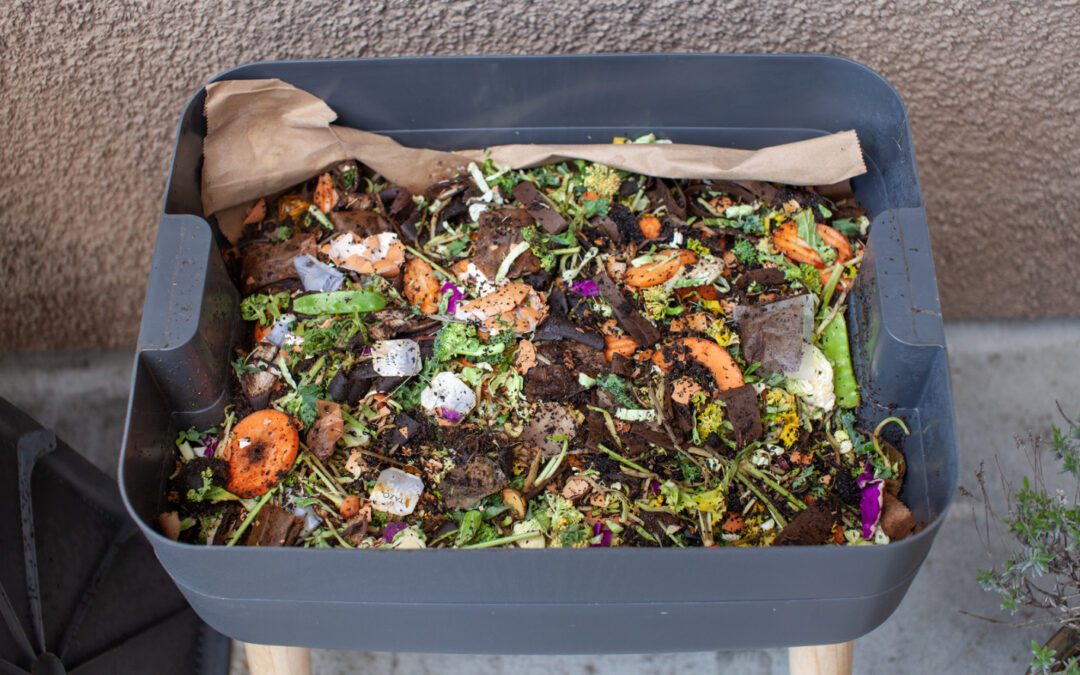
Compost is not “dirt” but a soil amendment, a vital ingredient that plants need to grow and thrive. Farmers and avid gardeners have long known its benefits, but it’s not just for people who live in wide-open spaces! Community gardeners add compost to potting mixes to help plants stave off disease for abundant blooms, fruits, and vegetables; and urban parks departments use it to restore depleted soils and keep street trees thriving.
But what is it? Essentially, compost is decayed organic material (food scraps, yard waste) that has been broken down and turned into nutrient-rich fertilizer.
How Is Compost Made?
If you’re a San Francisco, Oakland, or Berkeley resident, you’re likely already familiar with mandatory curbside composting and the green bin that gets emptied weekly. But what happens to those food scraps? Unlike community gardens and home composters, which have bins and composting systems that are generally too small to process meat, dairy, and compostable bioplastic, industrial facilities can collect tons of compostable material and process it efficiently. But to make compost, the basic process requires the same factors and ingredients. When monitored and managed carefully, these factors combined create an ideal environment for composting:
- Organic matter (Note: “organic” refers to any plant or animal material; compostable material does NOT have to be certified organic to be compostable!): A mix of “greens” and “browns”:
- Browns: “Dry” material (e.g., dry leaves, wood chips, and straw) provides carbon.
- Greens: “Wet” material (e.g., wet grass clippings, vegetable peels, fruit cores, coffee grounds, and tea leaves) provides nitrogen.
- Physical composters:
- Macroorganisms (e.g., snails, mites, earthworms) are visible to the naked eye. They process larger organic matter by chewing it up and excreting it.
- Microorganisms (e.g., bacteria, fungi)1 naturally occur in the environment and further break down organic material that macroorganisms leave behind.
- Oxygen/aeration: Most composting organisms need oxygen, which can be achieved by flipping or turning a pile, or transferring materials between bins. An exception to this is bokashi, a process that uses fermentation to create compost and requires an anaerobic environment.
- Moisture: Physical composters need moisture to stay alive. Too much or too little moisture can inhibit the composting process. The consistency of a damp sponge is ideal.
- Heat: Composting has different stages, but active breaking down of materials requires heat, as composting generally requires thermophilic conditions—those that are best for organisms that live in warm environments—to process. Large compost piles generate a lot of heat, while small bins generate less. Heat must be managed so that microorganisms and macroorganisms can thrive.
- Time: Large piles take a few weeks, while small piles or bins can take a few months.
- Space: Anything from huge industrial facilities to three-bin systems or piles to tiny worm bins can create compost.

Vermicomposting at Home
Composting can be done by almost anyone, nearly anywhere, with a little planning. And while worm bins, with their small footprint and wriggly inhabitants, are not meant to replace curbside composting, they can help kids understand what’s happening to those apple cores and banana peels that they don’t eat. Ask kids to help you each step of the way as the worms get established.
What You’ll Need
- A warm place away from windows and heaters to store the worm bin (about 59 to 77 degrees Fahrenheit is best)2
- Small plastic bin or other container (or you can buy a premade vermicompost bin online), ideally 12” x 12” x 12”, but anything that fits your space will work
- Tray that fits your bin (optional)
- Drill with ¼” bit
- Fine screen for covering ventilation holes (optional; window screen patch kits work well); nontoxic glue to attach the screen
- Newspaper or newsprint (black-and-white pages are best) torn or shredded into strips
- Red wriggler worms (can be purchased online; in the Bay Area, this list from the Ecology Center in Berkeley has extensive sources), about one pound
- Spray bottle
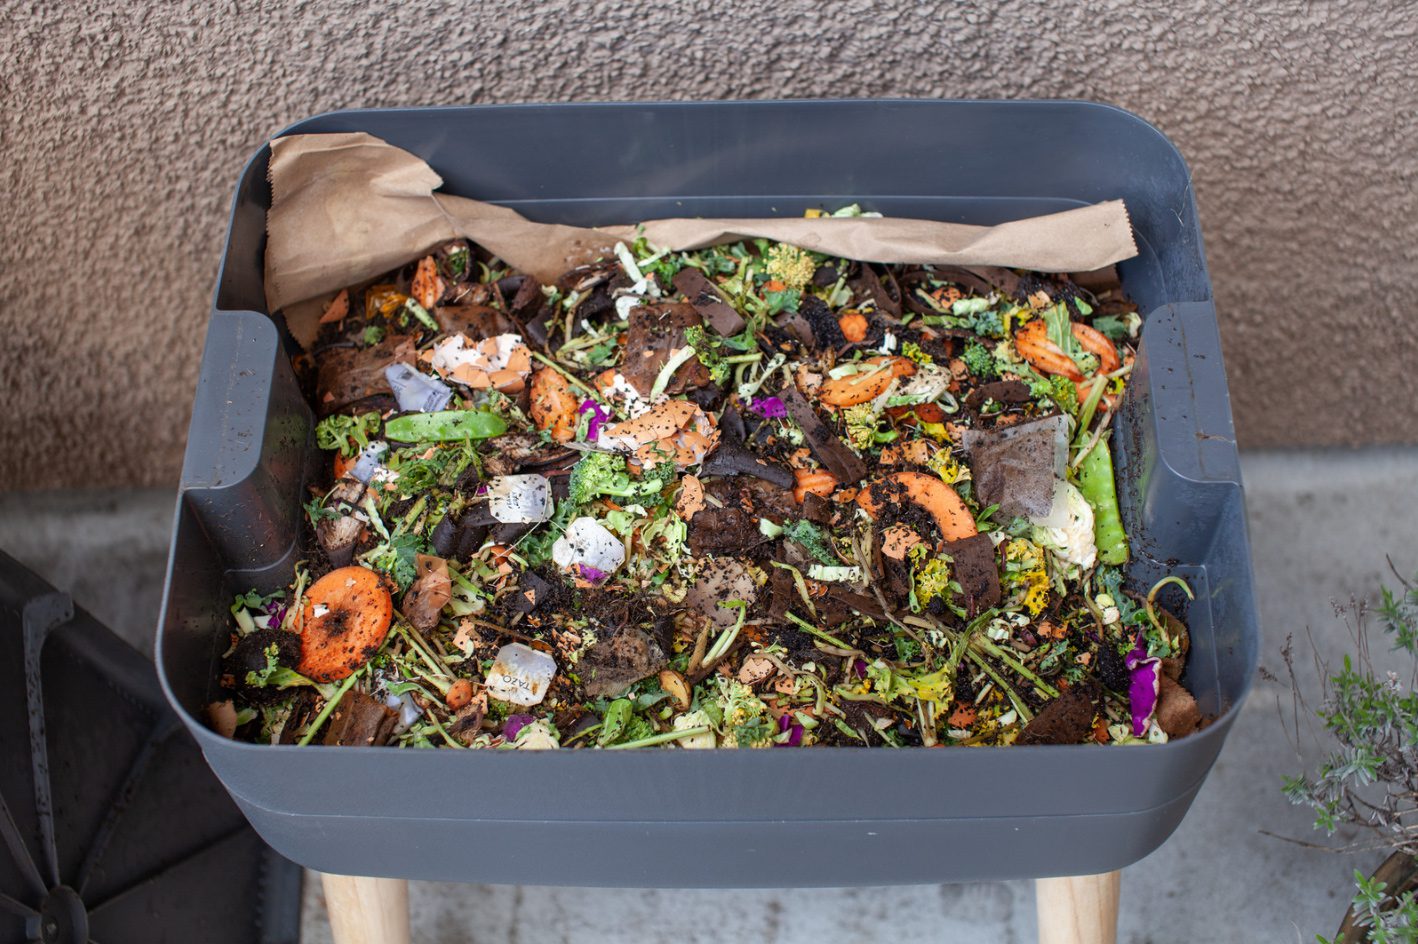
- Food scraps, cut into small pieces: Use just fruit and vegetable scraps, tea leaves, or coffee grounds (in moderation). Do not use meat, dairy, oil, or food that has been cooked in oil. These materials become rancid quickly and may attract pests. Citrus peels have powerful oils that worms may not want to eat, so keep these to a minimum.
How to Set It Up
- If you’re using a premade worm bin, skip ahead to step 2. Otherwise, drill about a dozen ¼” ventilation holes in the lid of your bin, and three on each side. You can add holes to the bottom as well, but be sure to use a tray to collect moisture. If you’re screening the holes, be sure to apply it only with nontoxic glue.
- Once the glue, if using, has dried, rinse the inside and outside of the bin and dry it.
- Moisten the newspaper. Ask kids to help lightly spritz the newspaper strips. The moisture level of a damp sponge is ideal. If the strips are too wet, dry them for a while, or wring them out over a sink. Kids can help troubleshoot until the newspaper is ready.
- Place newspaper strips in the bin until it’s about two-thirds full.
- Add worms. Kids can place them inside the bin on top of their newspaper bed. The worms will find their way to the bottom of the bin eventually.
- Feed the worms. Weigh your food scraps or ask kids to weigh them with a kitchen scale. Plan to use about a pound of food scraps to start. One pound of worms will process about three and a half pounds of food scraps per week. 3
- Place your bin in an out-of-the-way place, but not so hidden that kids will forget to check it!
- Monitor the bin for moisture and food level. Every couple of days, ask kids to help you check the bin to see what the worms have eaten. Are there still food scraps? What’s been left behind? Ask kids to note which foods have been eaten quickly, and ask them why worms might prefer certain foods. (Like people, worms have favorite foods too!)4 If food scraps are too large, remember to cut them smaller.
Harvesting Compost
In a few months, your bin will be nearly full! To harvest the compost:
- Move all the contents to one side of the bin.
- On the other side, make a new newspaper bed, following steps 3 and 4 above, but use half the paper.
- Add food scraps to the new bed.
- Over a month, worms should move to the new bed.
- Ask kids to help you collect the finished vermicompost, shaking out any worms that may be left behind.
More Resources
Need help troubleshooting your worm bin? Check out this guide from the NC State Extension program, or get help from a local community composting program in your area.
Interested in helping your kids learn more but don’t have the time to monitor a worm bin? Community gardens in your area may offer learning opportunities for children.
For more STEM and STEAM projects, enroll your kids in one of STEMful’s summer camps, school break camps, or afterschool programs, to sprout their curiosity and foster a lifelong love of learning.
- “Compost Pile Microbes,” CalRecycle, accessed March 21, 2023, https://calrecycle.ca.gov/organics/homecompost/microbes/.
- “Composting at Home,” EPA, accessed November 22, 2022, https://www.epa.gov/recycle/composting-home/.
- “Indoor Composting with a Worm Bin,” New York Botanical Garden, accessed March 21, 2023, https://libguides.nybg.org/c.php?g=725389.
- “Composting Worms Don’t Like Citrus or Spicy Foods – Here’s Why!,” August 17, 2021,
Solana Center for Environmental Innovation, https://solanacenter.org/2021/08/17/composting-worms-dont-like-citrus-or-spicy-foods-heres-why/.